Here is how to use the Automated Events feature
First you need to create a contact list that contains the names and information of the individuals you would like to automate sending for a specific event.
Go to “Contacts” in the tool bar on the left side of your screen and create your contact list.
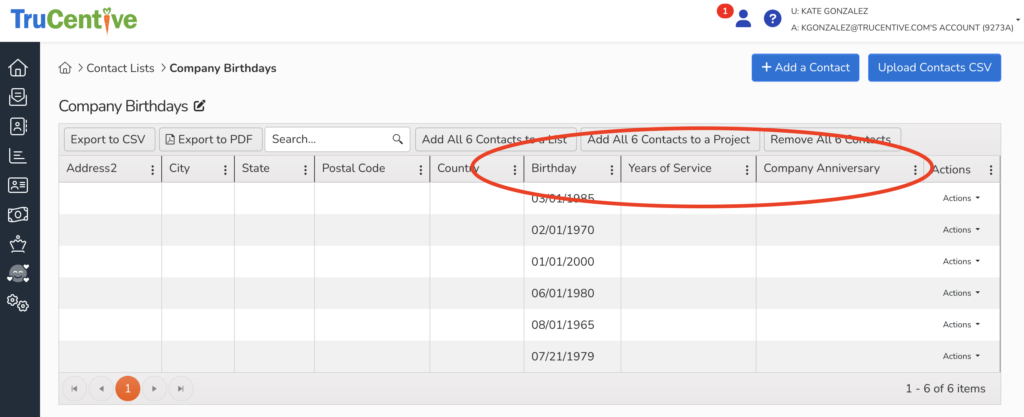
Make sure that when you add your contacts that you also enter the necessary date in the custom field that will pertain to the event that you want to create. i.e birthday, company anniversary, bonus days, etc
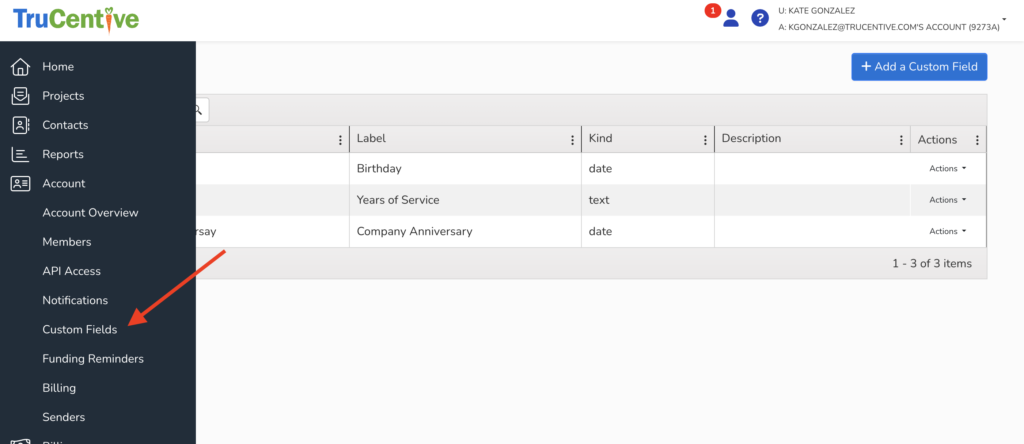
If you need to create a new custom field you can do this by going to “Account” in the tool bar on the left side of the screen and then “Custom Fields” and then +Add a Custom Field
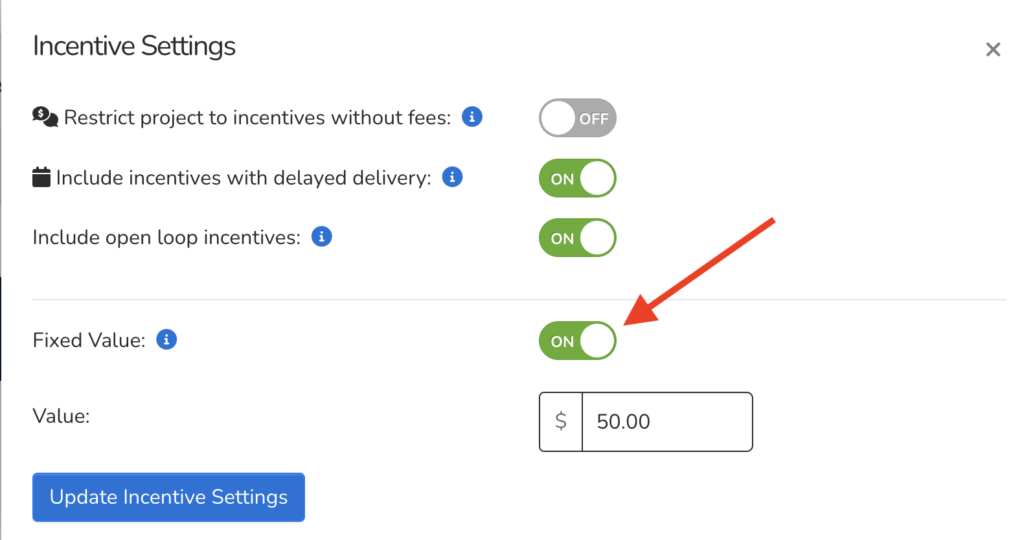
Before you create your automated event you will need to make sure that your incentive is set to a fixed value in your incentive settings in the incentives tab.
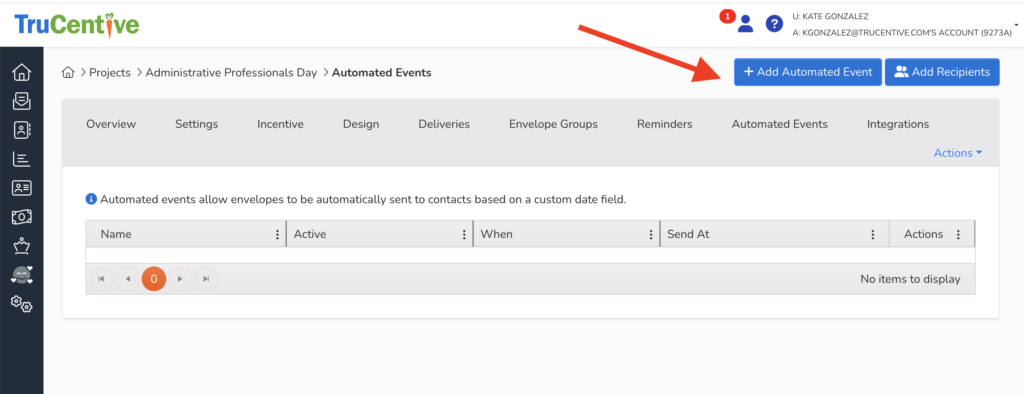
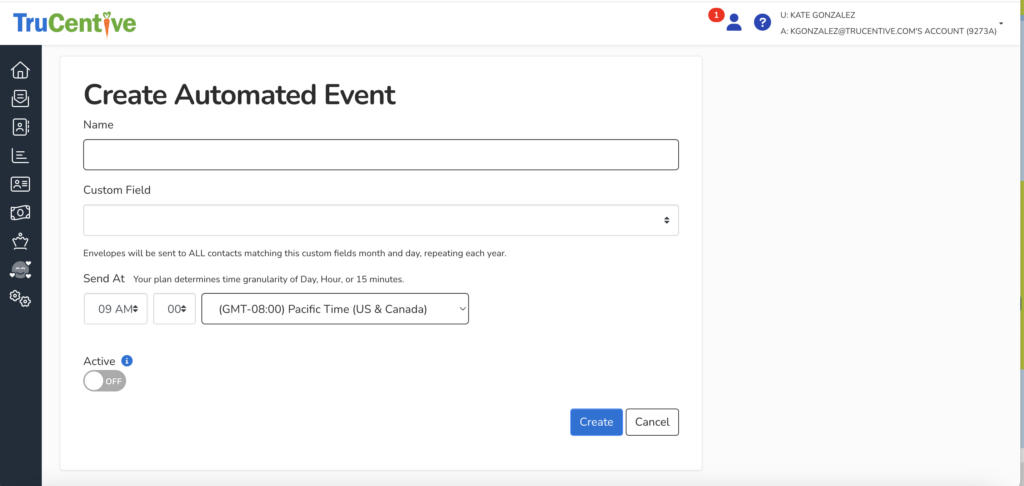
Next to set up your automated event within a project you will need to go to the “automated events” tab within your project and click on +Add Automated Event
From here you will name your event, and then select the custom field that applies to the event. Choose the time of day you would like your incentive to send and then toggle the Active switch to On.
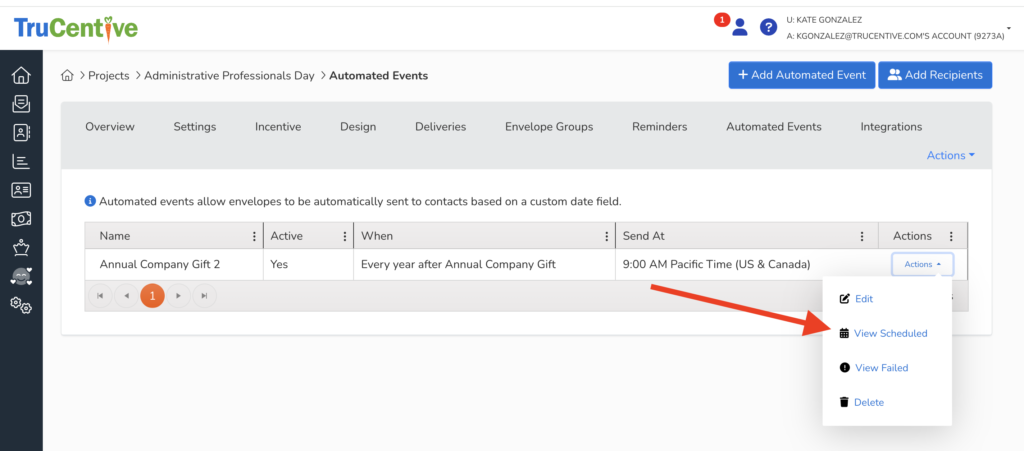
Once your event has been created you can perform certain actions by clicking on the actions drop down menu in the far right column of the event.
- Edit – will return you to the automated events settings screen where you can adjust the name, custom field, time or turn the trigger on and off
- View Scheduled – will show you all of the recipients names and information
- View Failed – will show you if any sends have failed
- Delete – will delete the automated event on that project
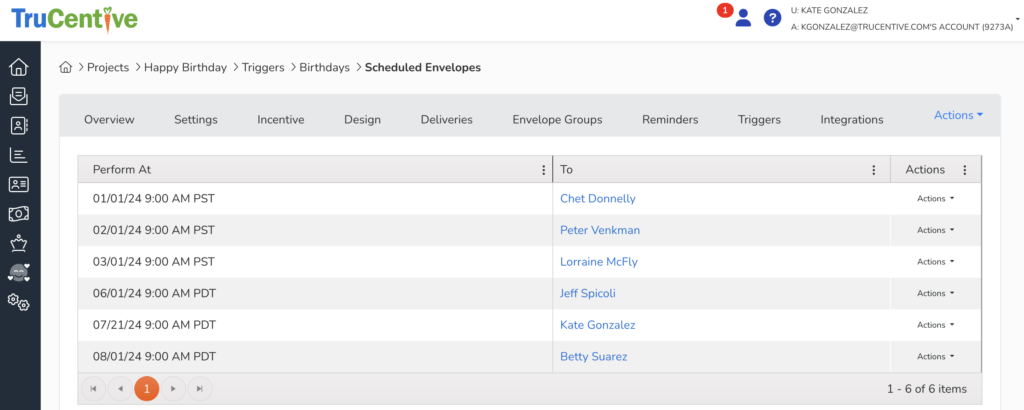
You will know that your automated event is set to go by clicking on the view scheduled. This screen will confirm all of the recipients and pertinent information.
Here is a quick tutorial video to walk you through the process!